
5 Tips to help Improve your video editing workflow in Premiere Pro
Have you ever taken over somebody’s video editing project and it was like trying to read Chinese algebra in braille?
An unorganised workspace is likely to lead to re-works or delivering a project over budget if the person taking over the project can’t find a file. This can have detrimental effects on a business, including reducing productivity and may create a stressful work environment.
Below are my 5 Tips to help improve your video editing workflow in Premiere Pro and change you from a weekend warrior to an in-house content creator at an agency.
TIP #1. Convenience leads to efficiency.
The saying goes “it is what it is,” so in regards to a video editing project’s assets (footage, logo’s, effects etc), don’t name it something else. If you have a logo that needs to be used as a watermark for a project, place this logo in a folder called “[clients name] logos”. Don’t be that guy who puts it on the desktop labelled CL1.png. Why you ask? Because not everybody knows that CL stands for client logo.
So before you import your footage, download the brief or look over the storyboard, I recommend you get your assets organised. If the client is ‘Bob’s Barber Shop’ then create a folder titled exactly that. This is where you will conveniently link every asset associated with Bob’s Barber Shop in the future. Now if somebody has to take over your project, they will know exactly where to look.
Bonus Tip!
If you use a Mac for video editing and want to get fancy, you can also replace the file image with the client’s logo. Simply:
- Open a jpg. of the clients’ logo
- > right click
- > copy, then, right-click on the file titled Bobs Barber Shop and select “get info”. A window will appear, click on the file icon so it is highlighted and press “command V”.
- > right click
As you continue to work on a client you begin to familiarize yourself with their logo as you have with popular brands such as McDonald’s, Subway & Mercedes. However, this leads me to my second point, sometimes a name is not enough.
TIP #2. Sometimes a name is not enough.
A brand is so much more than a logo, though, that’s a conversation for another time. If you can’t look at the Nike swoosh and know that product is of Nike’s range, then I question where you have been for the past 40 years. The point here is that in order to become more efficient you may need to reduce reading time.
When I import footage, sound, logo’s or anything else required for a video edit, I not only label the file in my finder before I import it, I colour label the file and its contents once it hits the media browser panel in Premiere Pro. I have my own little system that you can use or you can create one that works for you.
My System
I break down my footage into categories. For example, any drone footage, I colour blue, as a drone flies in the sky and for the most part, the sky is blue. I run and gun on the ground, so this footage is given brown, like the dirt. Footage shot from a tripod is red, a tripod is static and so am I when sitting at a red light in traffic. . . see where I’m going with this? It’s these little adjustments to my workspace that create efficiency & improve my video editing workflow. I don’t have to read the file title to know where it has come from when it is in my media browser or timeline, I can already see that by the colour.
To change the colour of your footage do the following:
- Import a folder to the media browser by clicking file>import>file> OR with the project panel selected press “command I” or “control I” on windows.
- Select your PRE-NAMED file (in this case DJI).
- Once the file has finished importing, open the file and highlight all of the contents and the file itself.
- Right click> label> and select your colour.
- Once the file has finished importing, open the file and highlight all of the contents and the file itself.
- Select your PRE-NAMED file (in this case DJI).
Doesn’t sound like much of a time saver but over time you’ll find yourself quickly knowing where to find certain clips with much more ease.
TIP #3. Know your shortcuts!
This one is pretty self-explanatory? Command (⌘) “I” is a lot quicker than clicking File>import>media. You can create your own shortcuts or edit the existing ones. This might take a while to adjust to but this tip is guaranteed to speed up your video editing workflow.
To do so:
- Click on Edit (on Windows) or Premiere Pro (on Mac) or hold option+command+k.
- Then, select the Keyboards Shortcuts option: This will open the keyboard shortcuts option box. A window that’s a little bit overwhelming will appear, but it wouldn’t be an Adobe product if it wasn’t. This window displays all of the shortcuts available for the selected panel, which you can change from the drop-down menu on the top left.
- Add/edit shortcuts that work for you.
- Then, select the Keyboards Shortcuts option: This will open the keyboard shortcuts option box. A window that’s a little bit overwhelming will appear, but it wouldn’t be an Adobe product if it wasn’t. This window displays all of the shortcuts available for the selected panel, which you can change from the drop-down menu on the top left.
Over time you’ll pick up on some different ones that could make your editing that little bit easier and faster. This may seem like a lot of effort every time you want to discover a shortcut, but don’t stress. I recommend you try asking our mutual friend Google, as there are multiple PDF’s you can download online. Another option is to buy a keyboard skin, these have the shortcuts printed on the keys, you can find these on eBay for around $20AUD.
TIP #4. Use proxy files.
Don’t be scared when you hear the word ‘proxy’, it’s going to be ok. If you have large video files to edit and you’re still rocking your MacBook Pro from mid-2013, chances are your laptop is going to slow down a bit (a lot) and struggle to process 4/5/6k+ footage. Proxy files help, creating or attaching a proxy file lets you downgrade your footage to a lower resolution like 1080 or 720 for editing purposes.
Once you have made your cuts, speed ramps and added all the bells and whistles that make your footage come to life, the click of a button will convert the file back to that beautiful high res footage with all of your applied effects.
“Ok, so how do I do this?” you ask. I’ll show you a step-by-step guide on how to set this up easily and efficiently.
- Select the footage you wish to create proxy files for.
- Right-click, select proxy>create proxies.
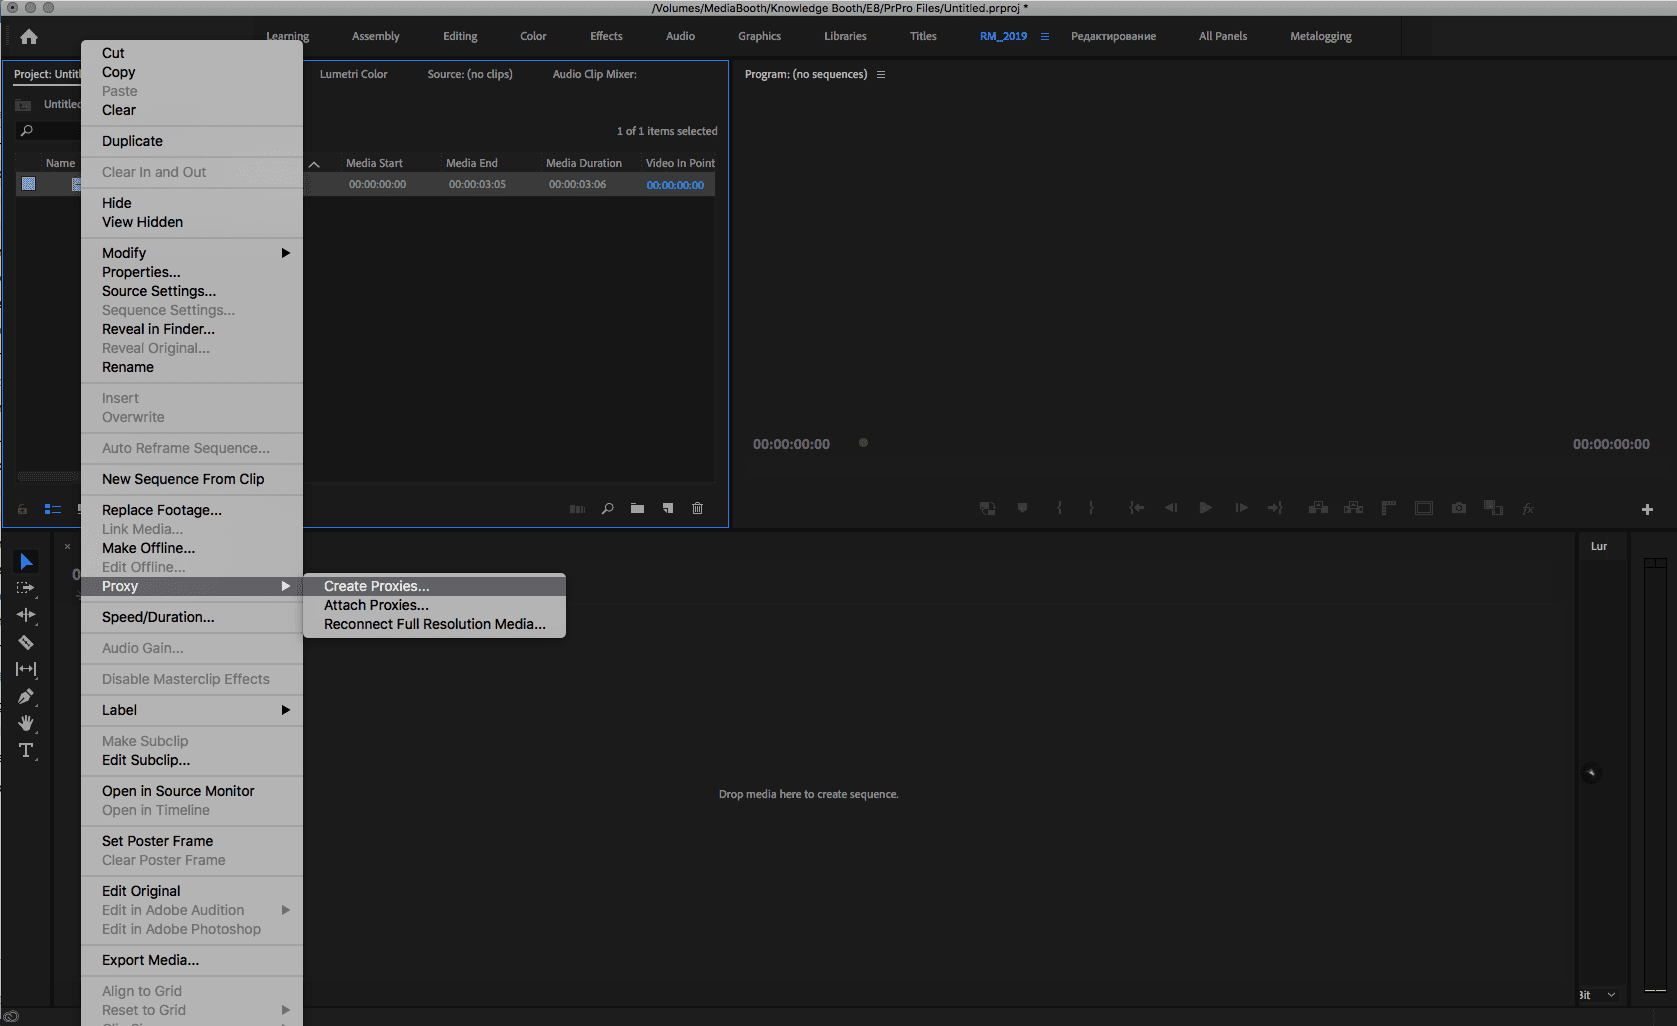
3. A dialogue box will open for you to select your settings.

4. Select your Preset (I choose Quicktime & the 1280×720 Apple ProRes 422 Proxy setting)
5. For the destination file, select “Next to original media, in Proxy folder”
6. Now Adobe Media Encoder will open and begin encoding your footage to a lower res file.
Congratulations you have just created the proxy files. Now how to use them in your workflow.
- In the program panel, select the small “+” icon in the bottom right-hand corner.
- Click and drag the toggle proxies icon (below) into the toolbar below your preview window.
![]()
3. When this button is clicked, you will be editing the low res proxies.
You’ll notice that your play head will smoothly scrub through your timeline and the playback will play without dropping as many frames. When the toggle proxies are turned off, you will drop frames and not run nearly as smooth.
TIP #5. Continue to be a weekend warrior.
Like anything, practice makes perfect (or as close to it as possible). You’re not always going to like what you’re creating at work, I’ve had to create videos on drawer sliders before, which was only slightly difficult to get excited about. When we shoot and edit films for ourselves, it’s usually something we are interested in or something that we take a bit of pride in. When you put in the time on a home project you might discover a little trick that makes you think “I could use this on the project I’m creating at work”. It all becomes one big learning circle. Watch other clips and try to recreate them, you may not have done the same thing to get the same result but it still works, 2 + 2 is 4 but so is 1 + 3.
SUPER TIP #1 And the something you should takeaway if you want to be successful
Collaborate with other creatives, take criticism on board, try different things, find your own flow but do your best to make it semi-universal, so at any stage, somebody can (hopefully) take over your project on drawer sliders.
Raigan Meadows.
Content Co-ordinator and Videographer at Media Booth®.
5 Tips to help Improve your video editing workflow in Premiere Pro
December 6 , 2019
Read More About Video Production :